• Skip to primary navigation
  • Skip to main content
  • Skip to primary sidebar

Showmehowtodoit.com

Information Technology Blog and Documentation Made Easy

  • Citrix
    • AppDNA
    • Command Center
    • NetScaler
    • XenApp
    • XenDesktop
  • Microsoft
    • Active Directory
    • Exchange
    • SQL Server
  • VMware
    • vRealize
    • vSphere
  • Training
  • Contact

Citrix XenDesktop and vCenter Self-Signed Certificate

June 7, 2014 By George Michaelides

Overview

This is a step-by-step guide how to integrate Citrix XenDesktop and vCenter Self-Signed Certificate.  This is an option used mainly in Citrix XenDesktop 7.x (and XenApp 7.5) PoC, lab or small production environments.  This article is specifically utilizing VMware vCenter 5.5 installed on Windows 2012 R2 (not the vCenter appliance) and Citrix XenDesktop 7.5.

There are alternative methods to utilize the vCenter self-signed certificate, but this option tends to be more effective.

Optional Resolution

1. First we need to connect to the vCenter server and locate the cacert.pem file.  The default location is C:\ProgramData\VMware\VMware VirtualCenter\SSL.  The ProgramData directory is hidden by default in Windows.  Locate and copy the cacert.pem file.

Citrix XenDesktop and vCenter Self-Signed Certificate 01

2.  Paste the cacert.pem file to a directory on the Citrix XenDesktop Controller.  In our example, directory C:\Temp was utilized. You utilize a USB drive, UNC share or other means, but for simplicity, directory C:\Temp was created and used.

Citrix XenDesktop and vCenter Self-Signed Certificate 02

 3.  Next we need to import this certificate.  From Run, type mmc and press OK.

Citrix XenDesktop and vCenter Digital Certificate Integration 03

 4. On the File menu, select Add/Remove Snap-in.

vCenterCert_Image04

 5. Select Certificates from the Available snap-ins and click Add.

 vCenterCert_Image05

 6.  Select Computer account and click Next.

 vCenterCert_Image06

 7.  Click OK.

 vCenterCert_Image08

 8. Navigate to Certificates, Trusted Root Certification Authorities, right-click, select All Tasks and Import.

vCenterCert_Image09

 9. Click Browse.

 vCenterCert_Image11

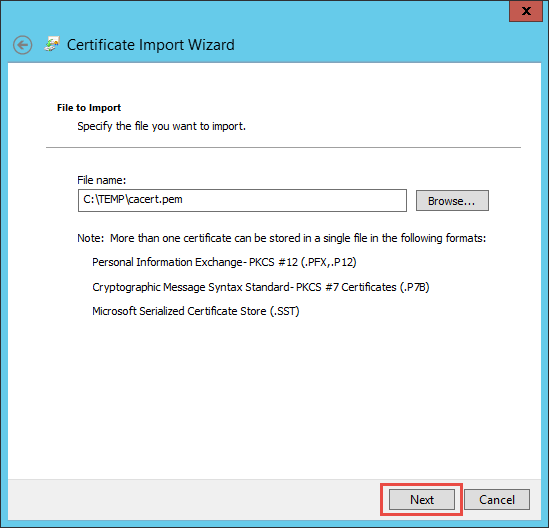
 10.  Navigate to the location where the cacert.pem is saved, select the cacert.pem file and click Open.  You may need to select the All files (*.*) option to view the cacert.pem.

vCenterCert_Image12

 11.  Click Next.

vCenterCert_Image13 

12. Click Finish.

vCenterCert_Image15

 13. Click OK.

vCenterCert_Image16

 This should enable you to integrate the Citrix XenDesktop / XenApp 7 controller with VMware vCenter.

References:

Using the default VMware vCenter server certificate in XenDesktop POCs

Filed Under: Citrix, XenDesktop Tagged With: vCenter, XenDesktop

Primary Sidebar

Recent Posts

  • Unidesk 4 Getting Started Guide
  • Unidesk File Share Configuration
  • Unidesk Active Directory Integration
  • How to Change the Unidesk Administrator Password
  • Unidesk Licensing for the Enterprise Layer Manager

This website uses cookies to improve your experience. We'll assume you're ok with this, but you can opt-out if you wish.Accept Read More
Privacy & Cookies Policy

Privacy Overview

This website uses cookies to improve your experience while you navigate through the website. Out of these, the cookies that are categorized as necessary are stored on your browser as they are essential for the working of basic functionalities of the ...
Necessary
Always Enabled
Necessary cookies are absolutely essential for the website to function properly. This category only includes cookies that ensures basic functionalities and security features of the website. These cookies do not store any personal information.
Non-necessary
Any cookies that may not be particularly necessary for the website to function and is used specifically to collect user personal data via analytics, ads, other embedded contents are termed as non-necessary cookies. It is mandatory to procure user consent prior to running these cookies on your website.
SAVE & ACCEPT
513