• Skip to primary navigation
  • Skip to main content
  • Skip to primary sidebar

Showmehowtodoit.com

Information Technology Blog and Documentation Made Easy

  • Citrix
    • AppDNA
    • Command Center
    • NetScaler
    • XenApp
    • XenDesktop
  • Microsoft
    • Active Directory
    • Exchange
    • SQL Server
  • VMware
    • vRealize
    • vSphere
  • Training
  • Contact

Unidesk Enterprise Layer Manager Appliance Deployment (ELM)

March 18, 2017 By George Michaelides

This is a step by step guide on how to import the Unidesk Enterprise Layer Manager (ELM) appliance into VMware vSphere and perform the initial configuration.

Articles in this Guide

  • Enterprise Layer Manager Appliance Deployment (ELM)
  • Licensing for the Enterprise Layer Manager
  • How to Change the Unidesk Administrator Password
  • Active Directory Integration
  • File Share Configuration

Deployment of ELM Appliance

1.  Download the installer from Unidesk.com. Once downloaded, extracted the files since the zip file contains the Unidesk Agent but also the Unidesk machine tools besides the Unidesk Enterprise Layer Manager.

Download the Unidesk Enterprise Layer Manager appliance from Unidesk.com

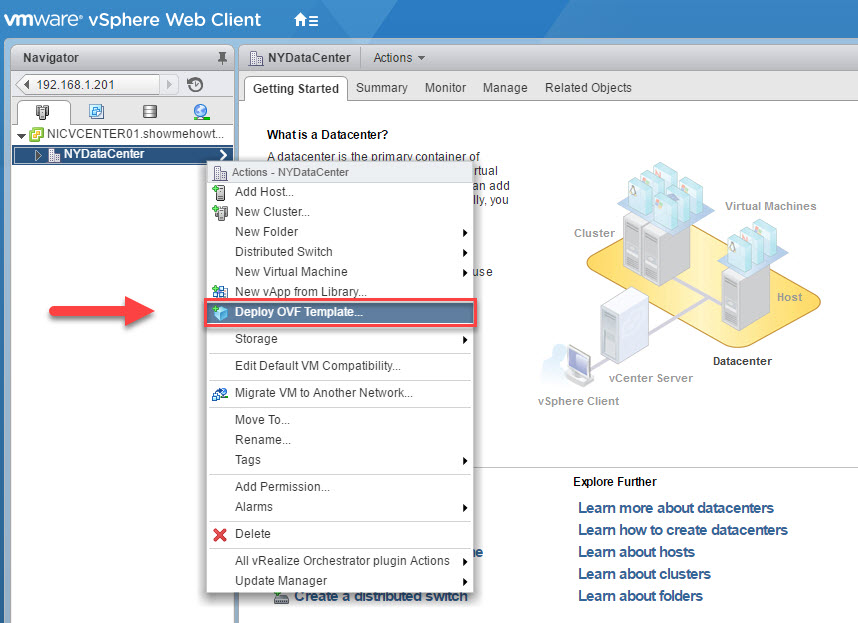
2.  Right-click a datacenter in the vSphere client and select the option to “Deploy OVF Template”.

3.  Browse to the extracted files and select the ova file.

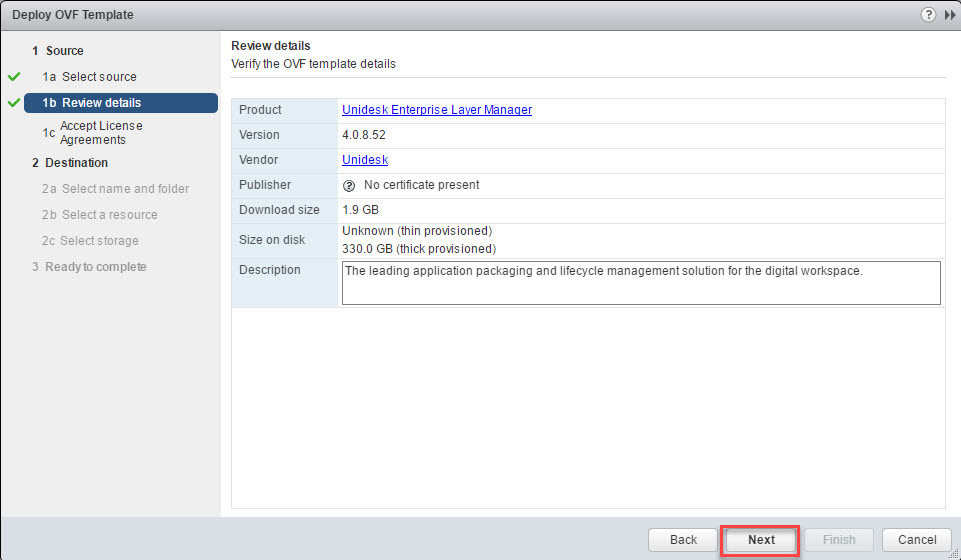
4. Click Next on the Review details.

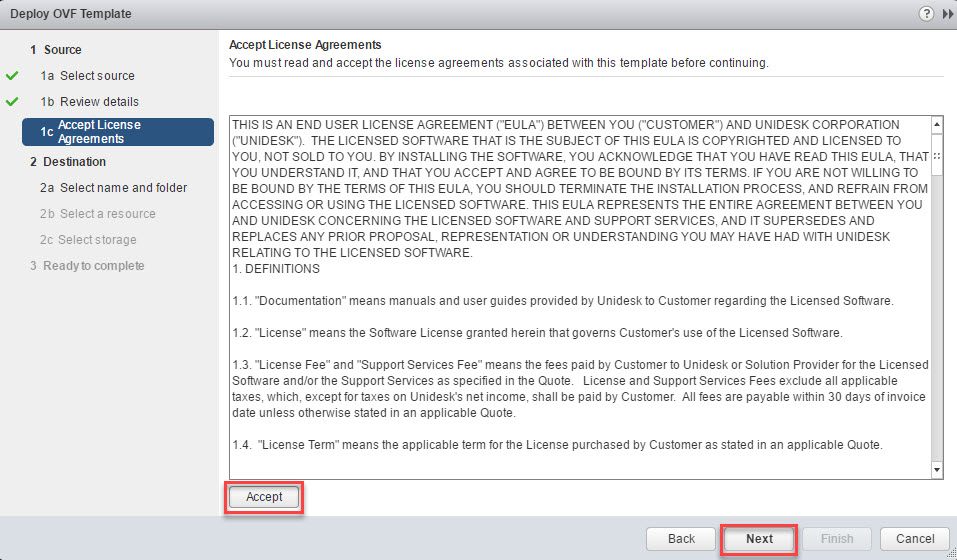
5.  Accept the license agreement and click Next.

6.  Select a resource and click Next.

7. Select a datastore and click Next.  The initial appliance configuration utilizes 300GB of storage, but you can extend it later.

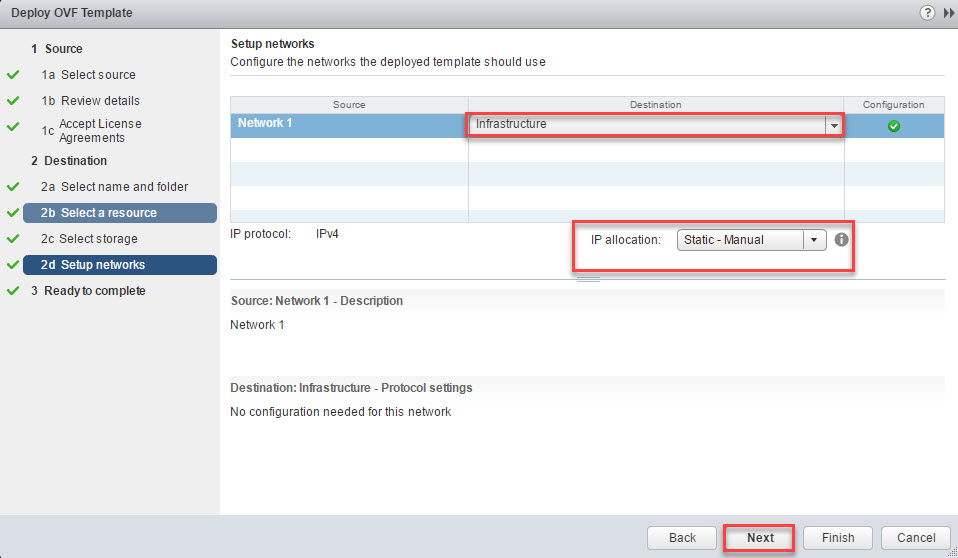
8.  Select the vmnetwork that the appliance will reside.  Also select IP allocation option.  You can opt for DHCP but in our demo, we will select “Static – Manual” and set the IP address from the console once we start the Enterprise Layer Manager appliance.

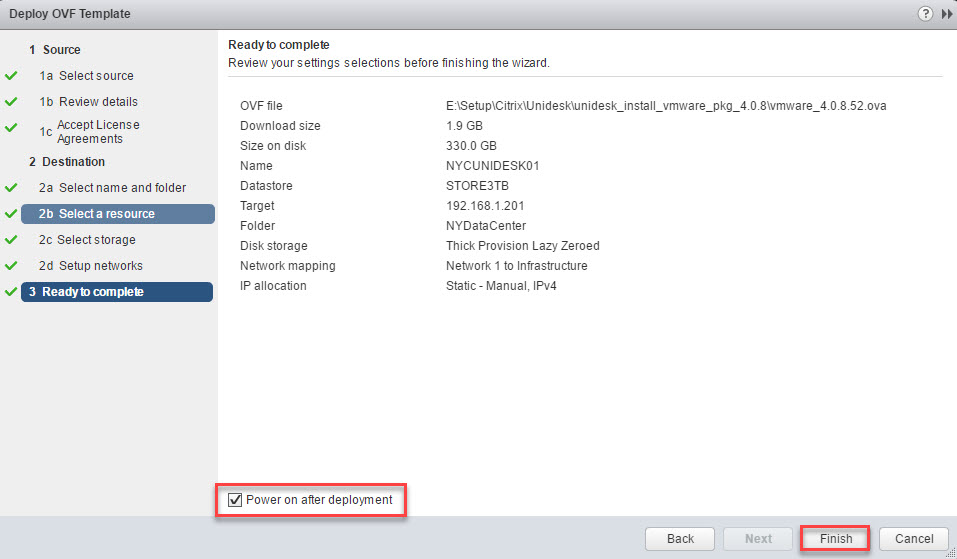
9.  Check the option to “Power on after deployment“, review the selected settings and click Finish.

Networking Configuration of Unidesk Enterprise Layer Manager Appliance

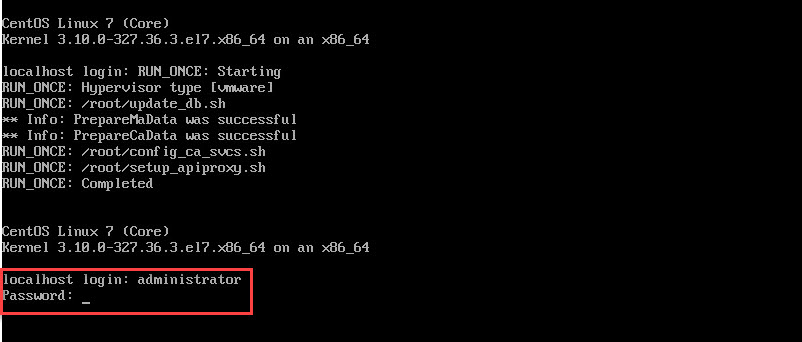
1.  Once the appliance is deployed and started, open a console to it and login.  You may need to press Enter for the login prompt to appear.  Login with the default account and password for the ELM appliance which are:

administrator
Unidesk1

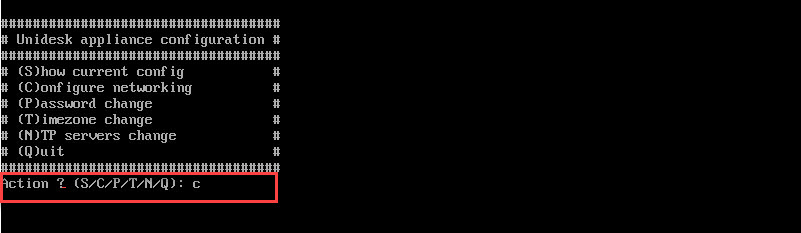
2.  Enter the letter C to proceed with configuring the network settings.

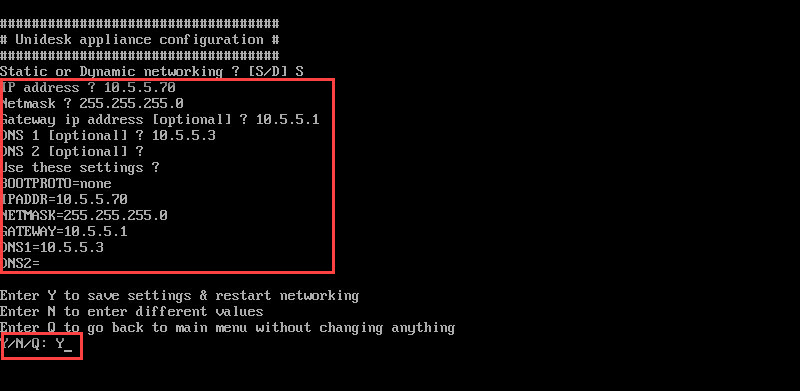
3.  Type S for static IP addressing.

4.  Enter the IP address, Subnet, Gateway, DNS values and type Y to save the settings and restart networking.

After this, you will be able to connect to the appliance’s web interface and proceed with the other configurations.

References

Unidesk Website

The site information will eventually be absorbed into the Citrix.com website.

Filed Under: App Layering, Citrix Tagged With: Unidesk

Primary Sidebar

Recent Posts

  • Unidesk 4 Getting Started Guide
  • Unidesk File Share Configuration
  • Unidesk Active Directory Integration
  • How to Change the Unidesk Administrator Password
  • Unidesk Licensing for the Enterprise Layer Manager

This website uses cookies to improve your experience. We'll assume you're ok with this, but you can opt-out if you wish.Accept Read More
Privacy & Cookies Policy

Privacy Overview

This website uses cookies to improve your experience while you navigate through the website. Out of these, the cookies that are categorized as necessary are stored on your browser as they are essential for the working of basic functionalities of the website. We also use third-party cookies that help us analyze and understand how you use this website. These cookies will be stored in your browser only with your consent. You also have the option to opt-out of these cookies. But opting out of some of these cookies may affect your browsing experience.
Necessary
Always Enabled
Necessary cookies are absolutely essential for the website to function properly. This category only includes cookies that ensures basic functionalities and security features of the website. These cookies do not store any personal information.
Non-necessary
Any cookies that may not be particularly necessary for the website to function and is used specifically to collect user personal data via analytics, ads, other embedded contents are termed as non-necessary cookies. It is mandatory to procure user consent prior to running these cookies on your website.
SAVE & ACCEPT
1531