• Skip to primary navigation
  • Skip to main content
  • Skip to primary sidebar

Showmehowtodoit.com

Information Technology Blog and Documentation Made Easy

  • Citrix
    • AppDNA
    • Command Center
    • NetScaler
    • XenApp
    • XenDesktop
  • Microsoft
    • Active Directory
    • Exchange
    • SQL Server
  • VMware
    • vRealize
    • vSphere
  • Training
  • Contact

vRealize Operations Manager Remote Collector Deployment

January 28, 2017 By George Michaelides

This is a step-by-step guide on how to deploy the VMware vRealize Operations Manager virtual appliance as a Remote Collector.  The deployment is utilizing the same OVA file as we utilized for the Master and Replica deployments.  The main difference is selecting the configuration option during deployment.
[contentblock id=4]

Remote Collector is available in two configurations:

  • Standard
  • Large
You will need to reference the VMware Sizing Guidelines to access which option is more appropriate for your environment.

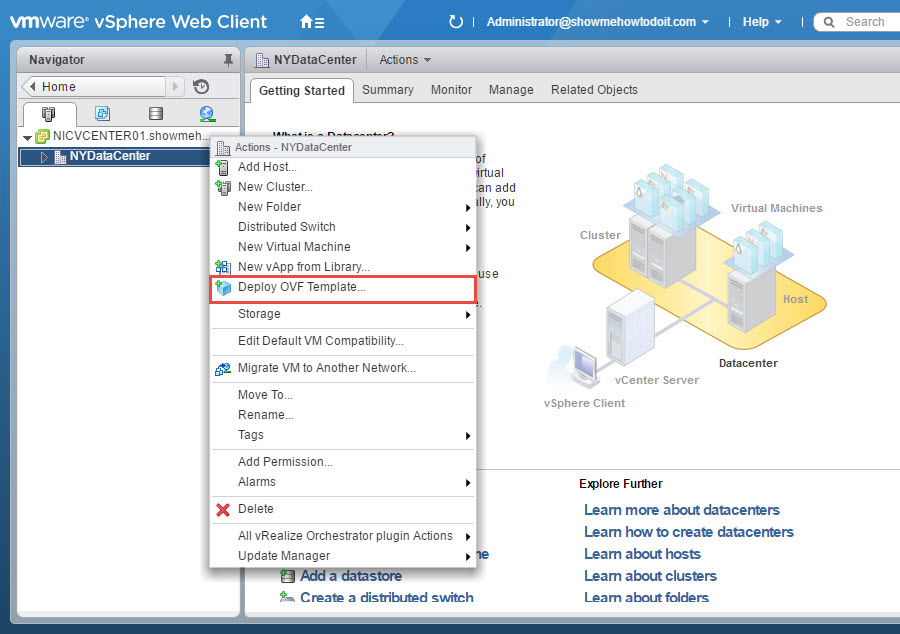
1. From with the VMware vSphere Web Client, select the option to “Deploy OVF Template” option.

vRealize Operations Manager Deploy OVA

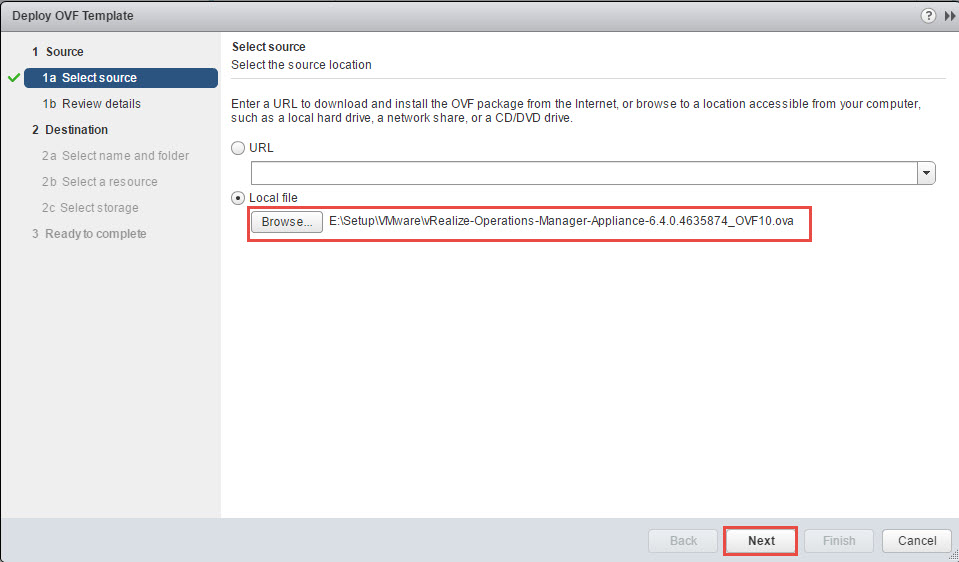
2. Browse to the location that you have saved the OVA file and select it.  Click Next.

vRealize Operations Manager Select OVA

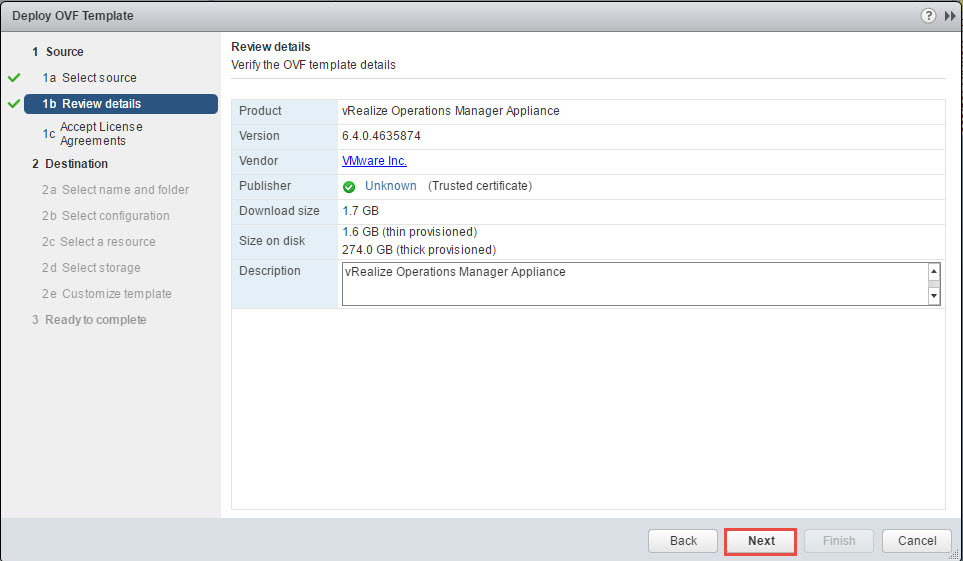
3.  Click Next on the Review details.

vRealize Operations Manager Review details during OVA deployment

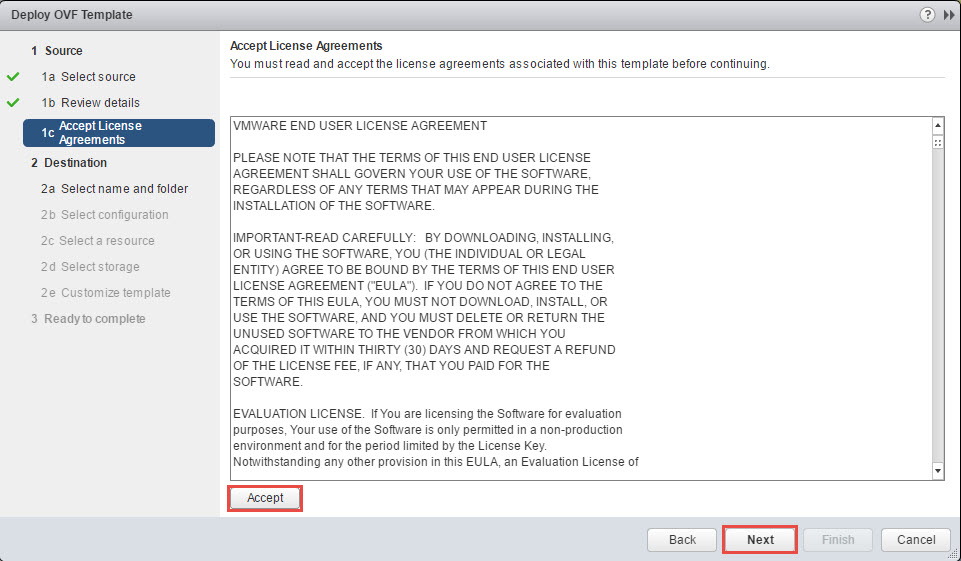
4. Read the license agreement, click on “Accept” and “Next“.

vRealize Operations Manager Accept Agreement during deployment

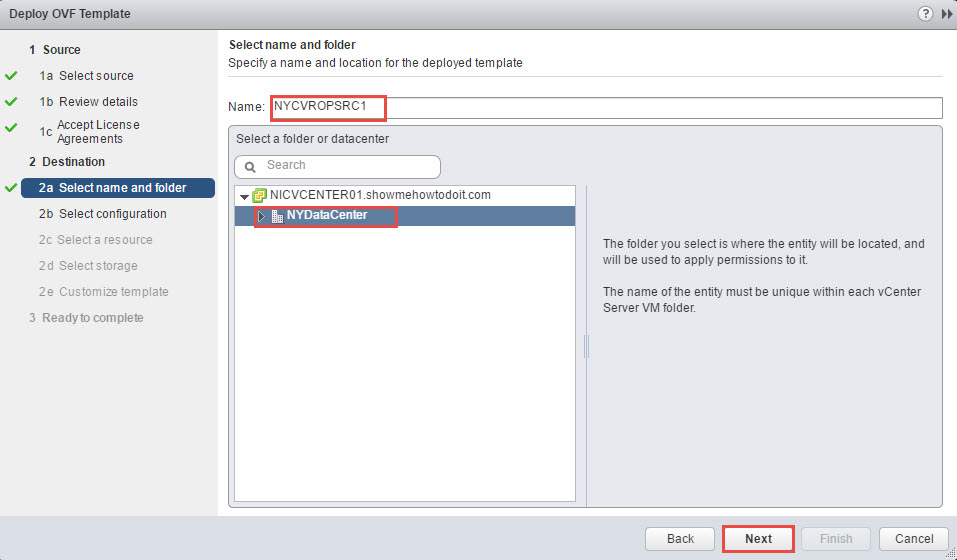
5. Enter the appropriate name for the appliance and select the appropriate location.  Click Next.

vRealize Operations Manager Remote Collector Name

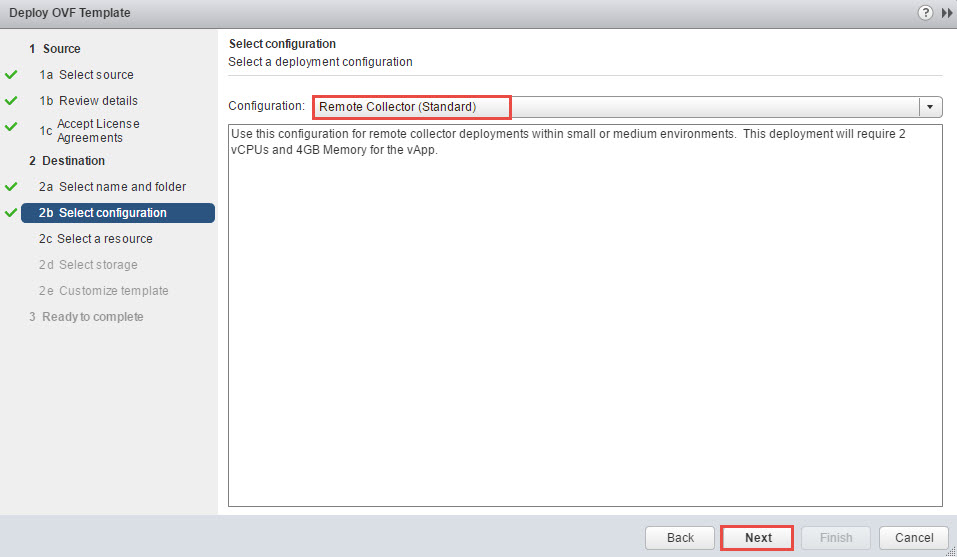
6. From the configuration drop-down, select “Remote Collector (Standard)“.  Again, this depends on the size of your environment. Click Next.

7. Select a host and click Next.

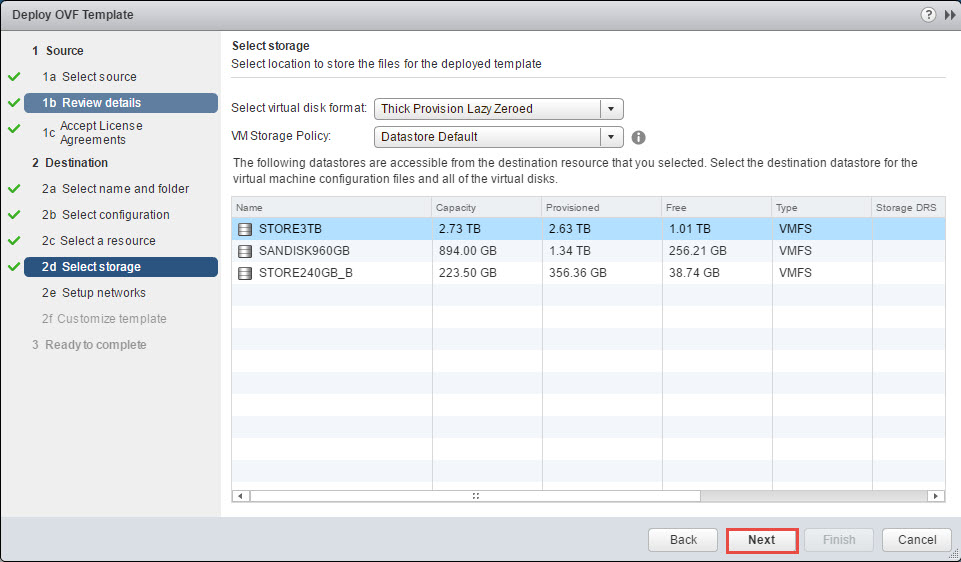
8. Select the appropriate datastore and disk format.  Click Next.

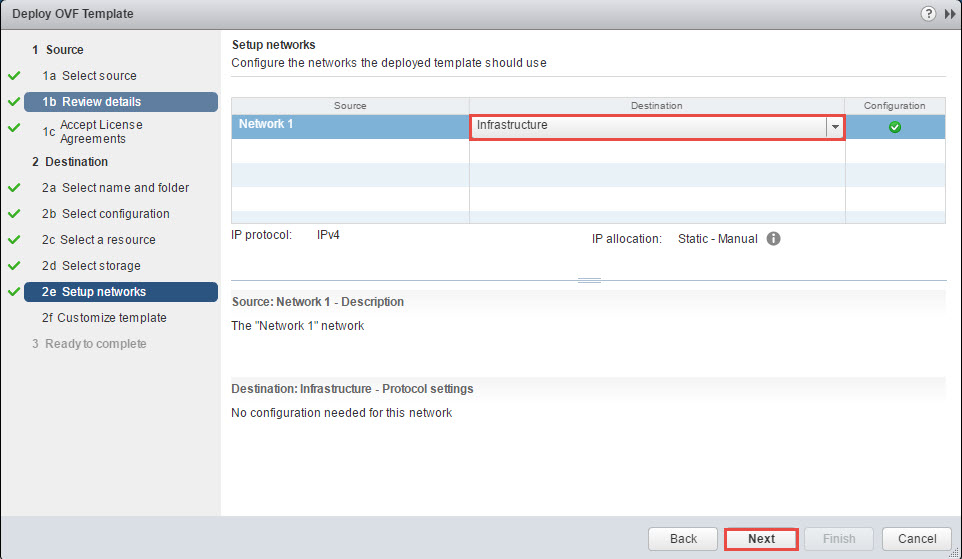
9. Select the appropriate virtual network and click Next.

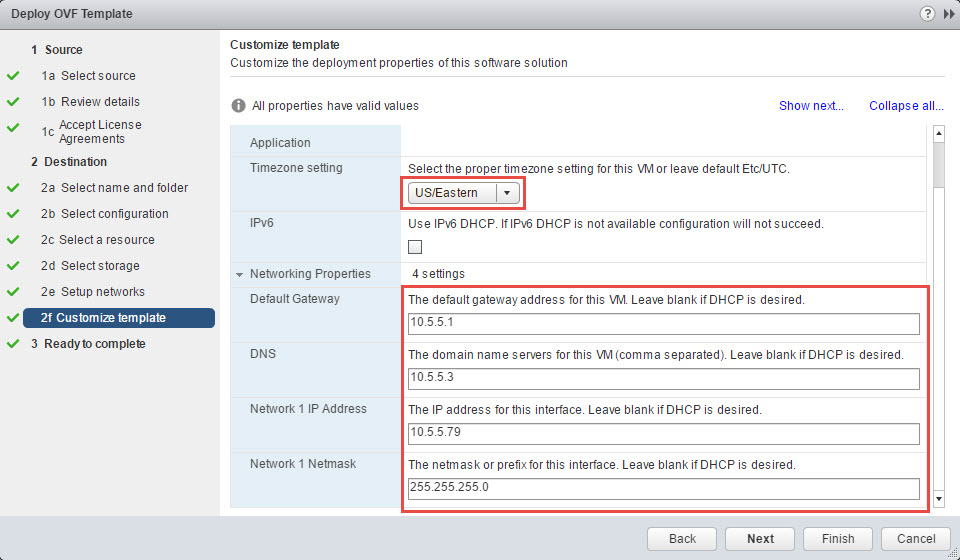
10.  In the customize template, select the appropriate Timezone for your environment and enter the appropriate Networking Properties.  You can also leave the Networking Properties blank if you utilize DHCP (most likely used with MAC reservation).


Click Finish to complete the deployment of the OVA. (If you click Next, you will have the option to review settings and also the option to power-on the appliance once it is deployed.)

References

vRealize Operations Manager Sizing Guidelines

Filed Under: VMware, vRealize

Primary Sidebar

Recent Posts

  • Unidesk 4 Getting Started Guide
  • Unidesk File Share Configuration
  • Unidesk Active Directory Integration
  • How to Change the Unidesk Administrator Password
  • Unidesk Licensing for the Enterprise Layer Manager

This website uses cookies to improve your experience. We'll assume you're ok with this, but you can opt-out if you wish.Accept Read More
Privacy & Cookies Policy

Privacy Overview

This website uses cookies to improve your experience while you navigate through the website. Out of these, the cookies that are categorized as necessary are stored on your browser as they are essential for the working of basic functionalities of the website. We also use third-party cookies that help us analyze and understand how you use this website. These cookies will be stored in your browser only with your consent. You also have the option to opt-out of these cookies. But opting out of some of these cookies may affect your browsing experience.
Necessary
Always Enabled
Necessary cookies are absolutely essential for the website to function properly. This category only includes cookies that ensures basic functionalities and security features of the website. These cookies do not store any personal information.
Non-necessary
Any cookies that may not be particularly necessary for the website to function and is used specifically to collect user personal data via analytics, ads, other embedded contents are termed as non-necessary cookies. It is mandatory to procure user consent prior to running these cookies on your website.
SAVE & ACCEPT
1308